The Hills Are Alive With the Sound of Klaxons
The natural fallout of having a modern printer capable of quickly vomiting out ridiculous amounts of terrain is the sudden desire to save time and effort. While looking into the potential usefulness of PVB, I stumbled across ‘rock’ filaments and was intrigued. Even ignoring marketing woo about ‘feeling like rock’ (no, it’s plastic) and special textures (no, plastic) and other questionable claims (p l a s t i c), my interest was piqued.
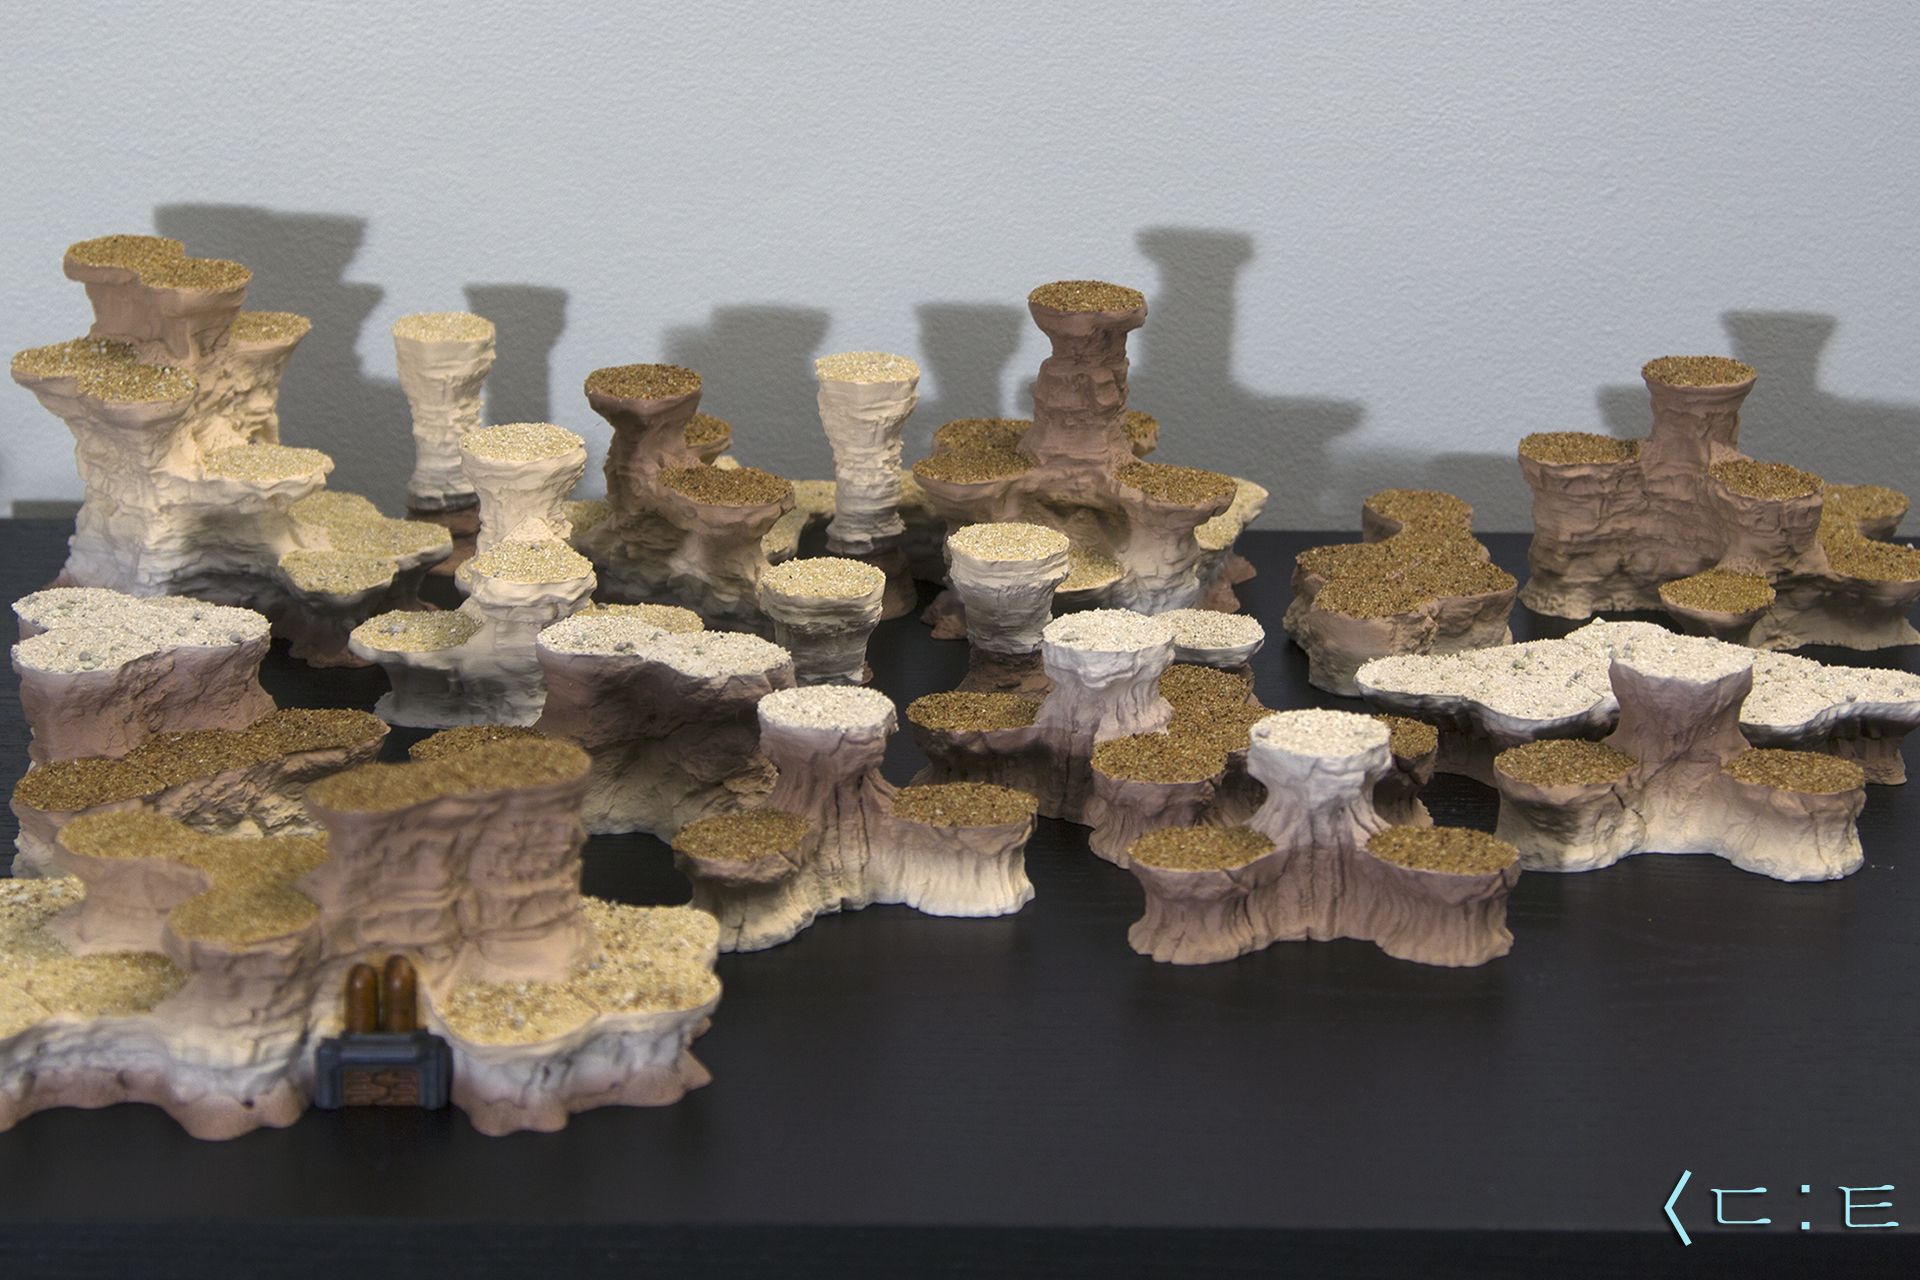
What’s better than a sprawling city? A sprawling city surrounded by hills. For Battletech, decades of tradition indicates the use of comically rocky hills. So, would it be possible to achieve acceptable quality and visual interest, with minimal post-processing, effectively straight off of the printer? I electronically slammed down my $20 and set up to find out.
There are a variety of manufactures of ‘rock-like’ filaments, but my choice for this grand experiment was Overture’s Rock PLA in ‘Fossil Rock’. While my experiences with Overture haven’t been purely excellent, they’ve been pretty okay, and I decided to go with a well-known brand that I at least had familiarity with. Initial research on rock-like PLA in general revealed numerous tales of woe and nozzle clogs, however, these seem centered entirely around ‘marble’ variants - the white-grey stuff infused with questionable black dots of mystery material. You know, the stuff that looks nothing whatsoever like marble. Given this isn’t a feature of rock-like PLA that actually looks anything like actual rock, I figured I wouldn’t have to worry about nozzle clogs. And indeed, I did not.
My hills of choice? HexTech, of course. Initially straight out of the free bundle, but I quickly found myself throwing my credit card at my screen because, let’s face it: HexTech.
The immediate result was magnificent, regardless of some outstanding flaws.
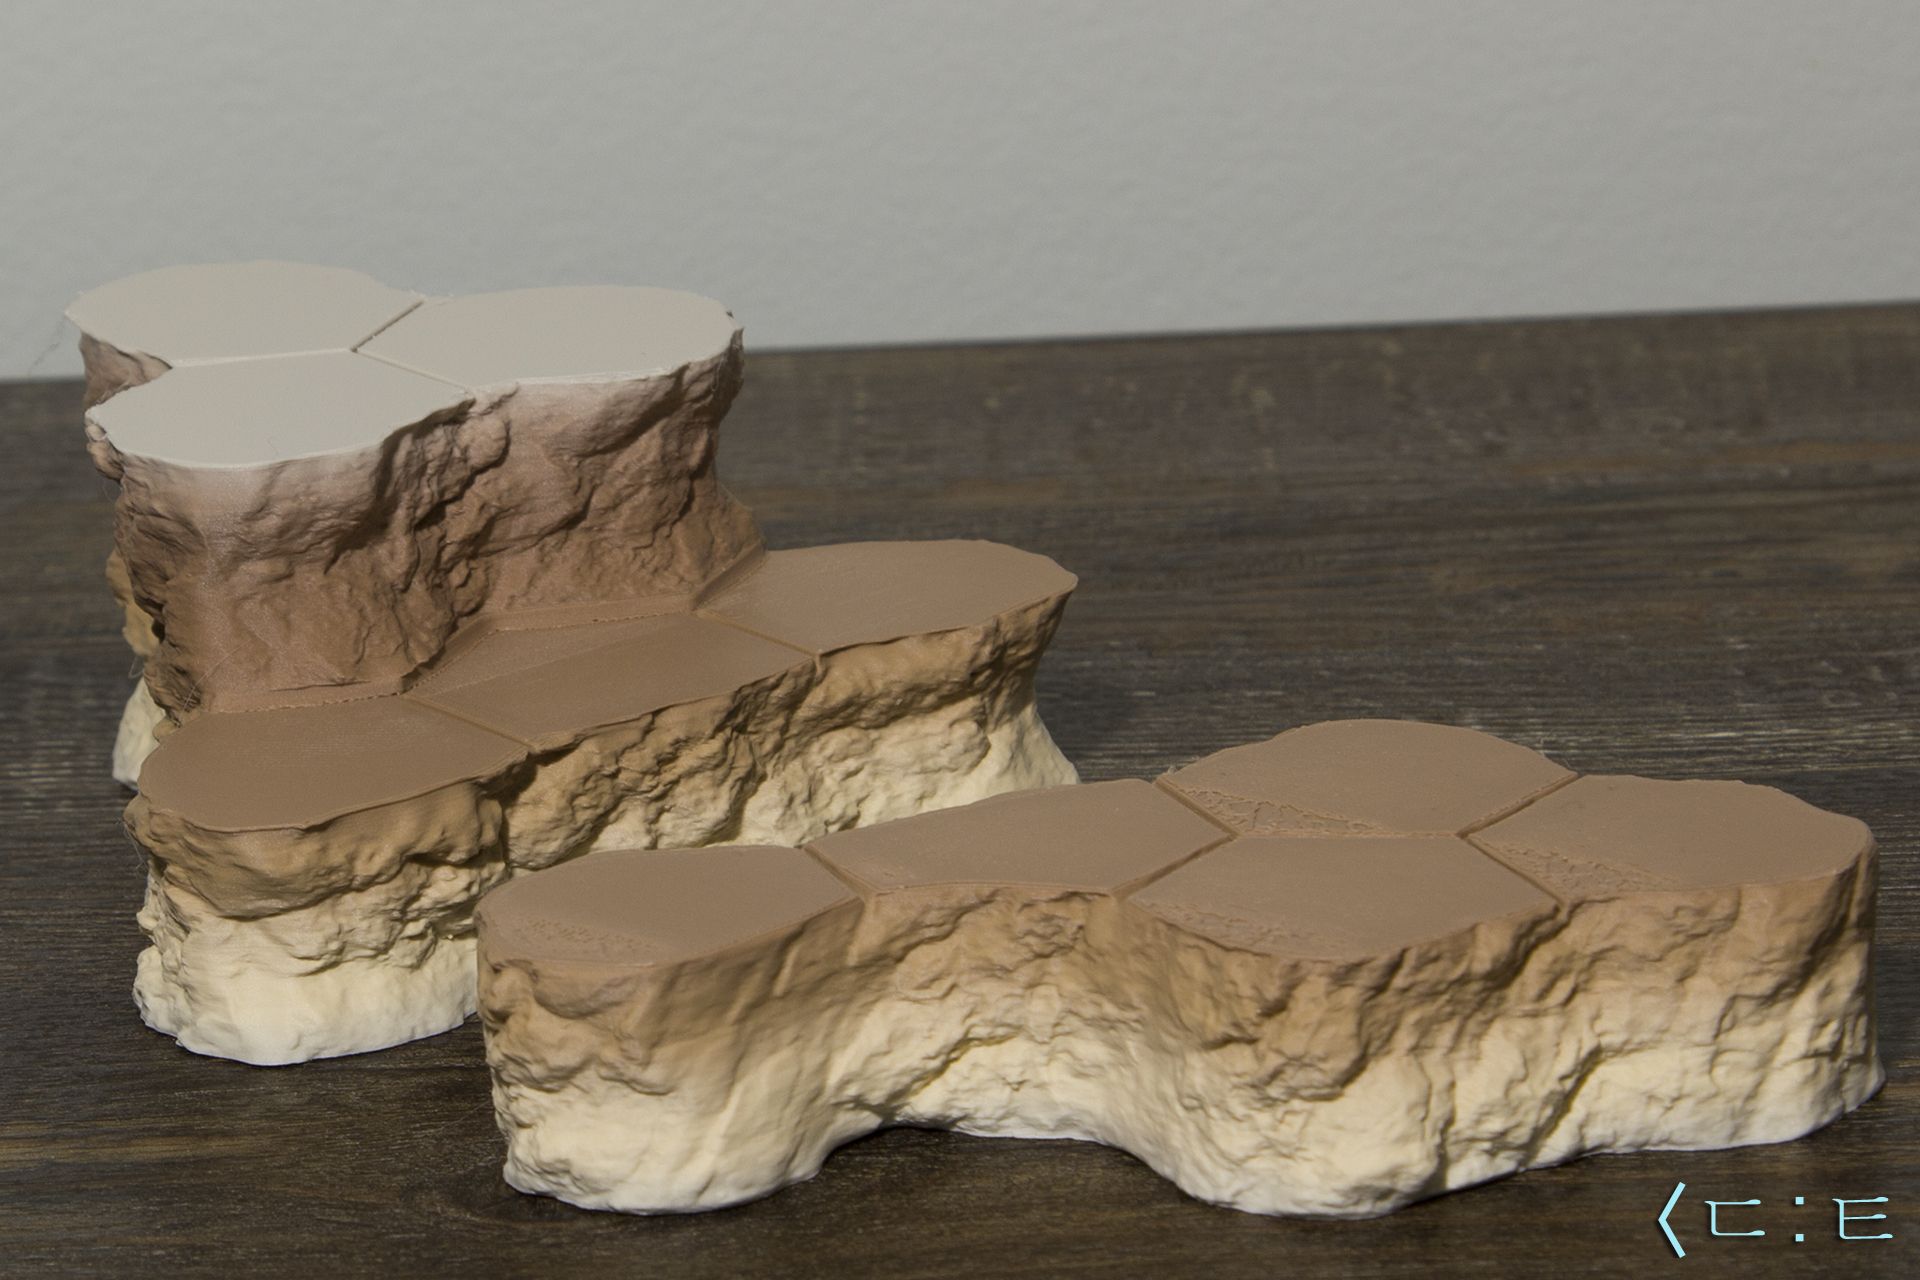
Flawed, but beautiful.
Settings on my A1 were kind of a crapshoot, given that - at least at the time - there was no verified preset for Overture Rock PLA. Had some minor overhang spaghoots on some pieces, but it’s hardly visible unless you’re inexplicably looking at the pieces from below. And by minor, I mean minor - everything was intact; nothing was floating, there weren’t any gaping holes - just a noodle here or there that was not exactly flattened. This problem largely vanished with judicious use of supports, which has also given me some fun looking refuse that would make for some nice treetrunks. The major issue, in my opinion, is the top surface; you can see the obvious defects here. The reality is I have completely forgotten that ironing is even a thing, because my Ender 3 was so catastrophically bad at ironing, that enabling it basically guaranteed the massacre of 20+ hour prints. At any rate, the defects here are nothing that can’t be easily covered up.
The beauty, though. The color transitions are gentle and lovely; and for best results, I suggest loading up a build plate to capacity to allow greater variation, especially on lower height pieces. The texture is indeed outstanding - there are visible layer lines, make no mistake, but they disappear from the eye from mere inches away.
Shiny. Or, hopefully, not.
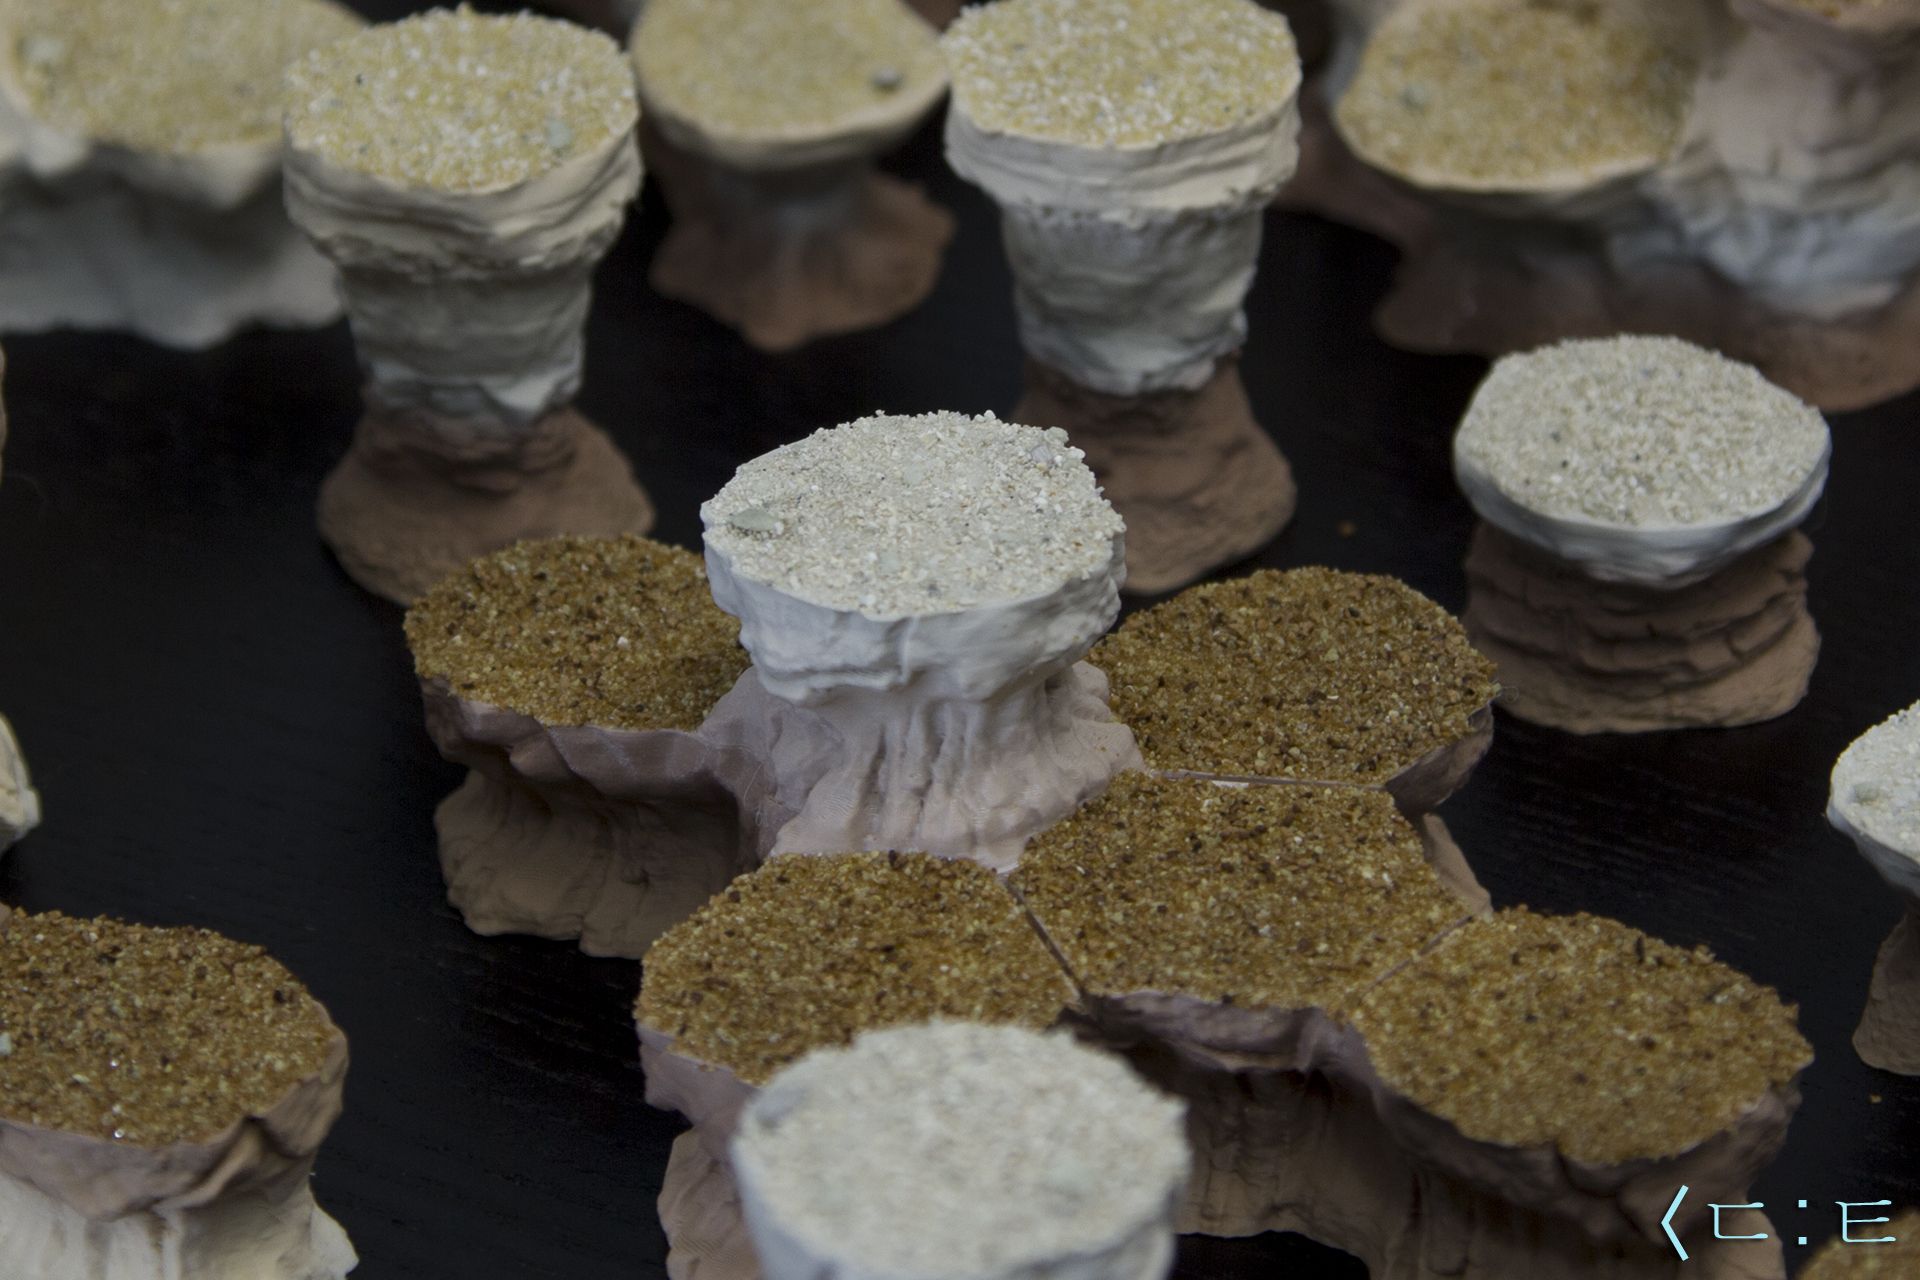
I figured on hiding the surface defects with simple ballast, even before the defects actually revealed themselves: the early/free HexTech hills have a perfectly smooth surface which looks rather odd. HexTech’s hills have moved on to having a natural texture on the surface, which is nice, but would still look somewhat weird without either painting (and avoiding large amounts of painting was the entire point of this exercise) or, well, ballast.
I’m not absolutely thrilled with what I achieved here - I was trying to color match, and could have done a much better job, but… Once again, the goal here was quick and easy, not spend days searching for the perfect shade of sand on Amazon or custom dying a bag of white and easy.
Despite that, I still had to go driving around for sand, and ended up with hobby sand that inexplicably had shiny sparkly bits - which were thankfully dulled greatly by matte spray.
Still, it all worked out well enough for my purposes.
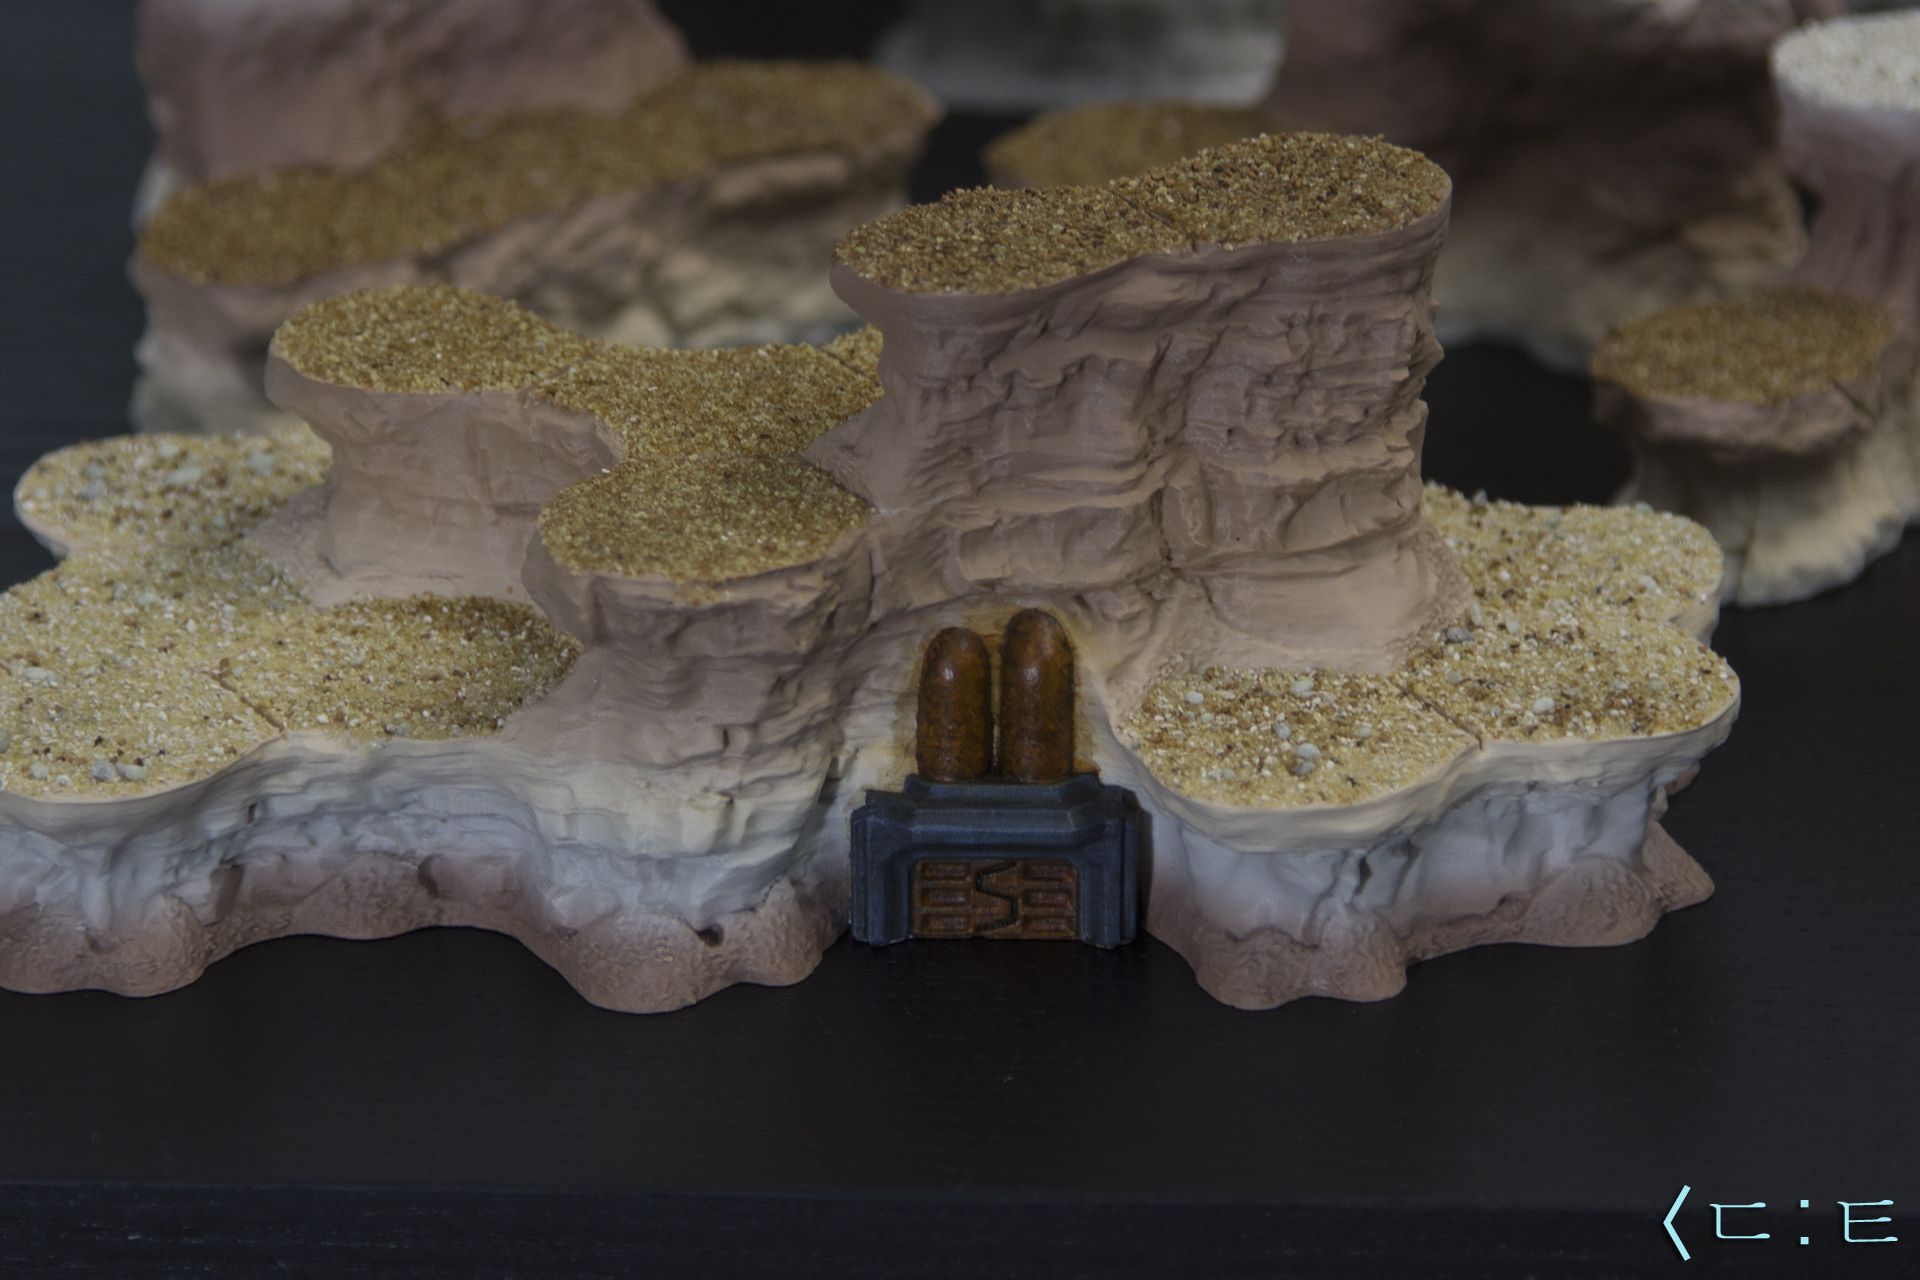
Tetanus detected.
A pleasant reminder to always look at your STLs in detail before printing. I got a fun surprise by way of entrenched pipes and a facility doorway that I could not avoid painting.
Since I was finishing these off between flocking several million miles of HexTech roads, it was a nice diversion.
But I clearly can’t be trusted with weathering and rust. Less is more? More is more. Do you even math, bro? Less can’t be more.
Conclusion
Now as to how to store these…
A+++++++++++++++ would be lazy again.
Pro:
- HexTech, as always, simply and utterly delivers.
- The gradient color and other properties of Rock PLA really do live up to marketing claims.
- With properly dialed-in settings, you could very realistically limit post-processing to virtually nothing more than cleaning up a few wisps of filament here and there.
- Absolute speed. The longest part of this project by far was waiting for spray-friendly temperatures since I wanted matte over the painted entrance and to reinforce the ballast.
Debatable Cons:
- Color variation will be lackluster on small, bespoke pieces. You really want a full build plate for the best effect.
- It’s utterly unfeasible to keep the colors in sync across plates. And so, geologists will hate you.
- While IMO, you can get away with variance between individual pieces, HexTech has some truly massive hills that require printing multiple build plates for a single piece. Those will probably not look great.